MENU

")
How I Made DIY Bridal Projects Fabulous!
Having expensive taste, does not always mean you need to break the bank! There are tons of things you can do at home with friends and family to help save money during your planning process. There are so many things I loved while I searched Etsy and some of my favorite bridal magazines, but as I started getting price quotes, I thought to myself, I can make that myself. And that is exactly what I did. I cut the majority of my costs in half, just by taking on my on DIY projects. I wanted to stay true to myself throughout the entire planning process, and I didn’t want to cut corners on the extremely important things, so I really had to evaluate what I knew I could do on my own, that wouldn’t compromise the essence of our classic glam wedding.
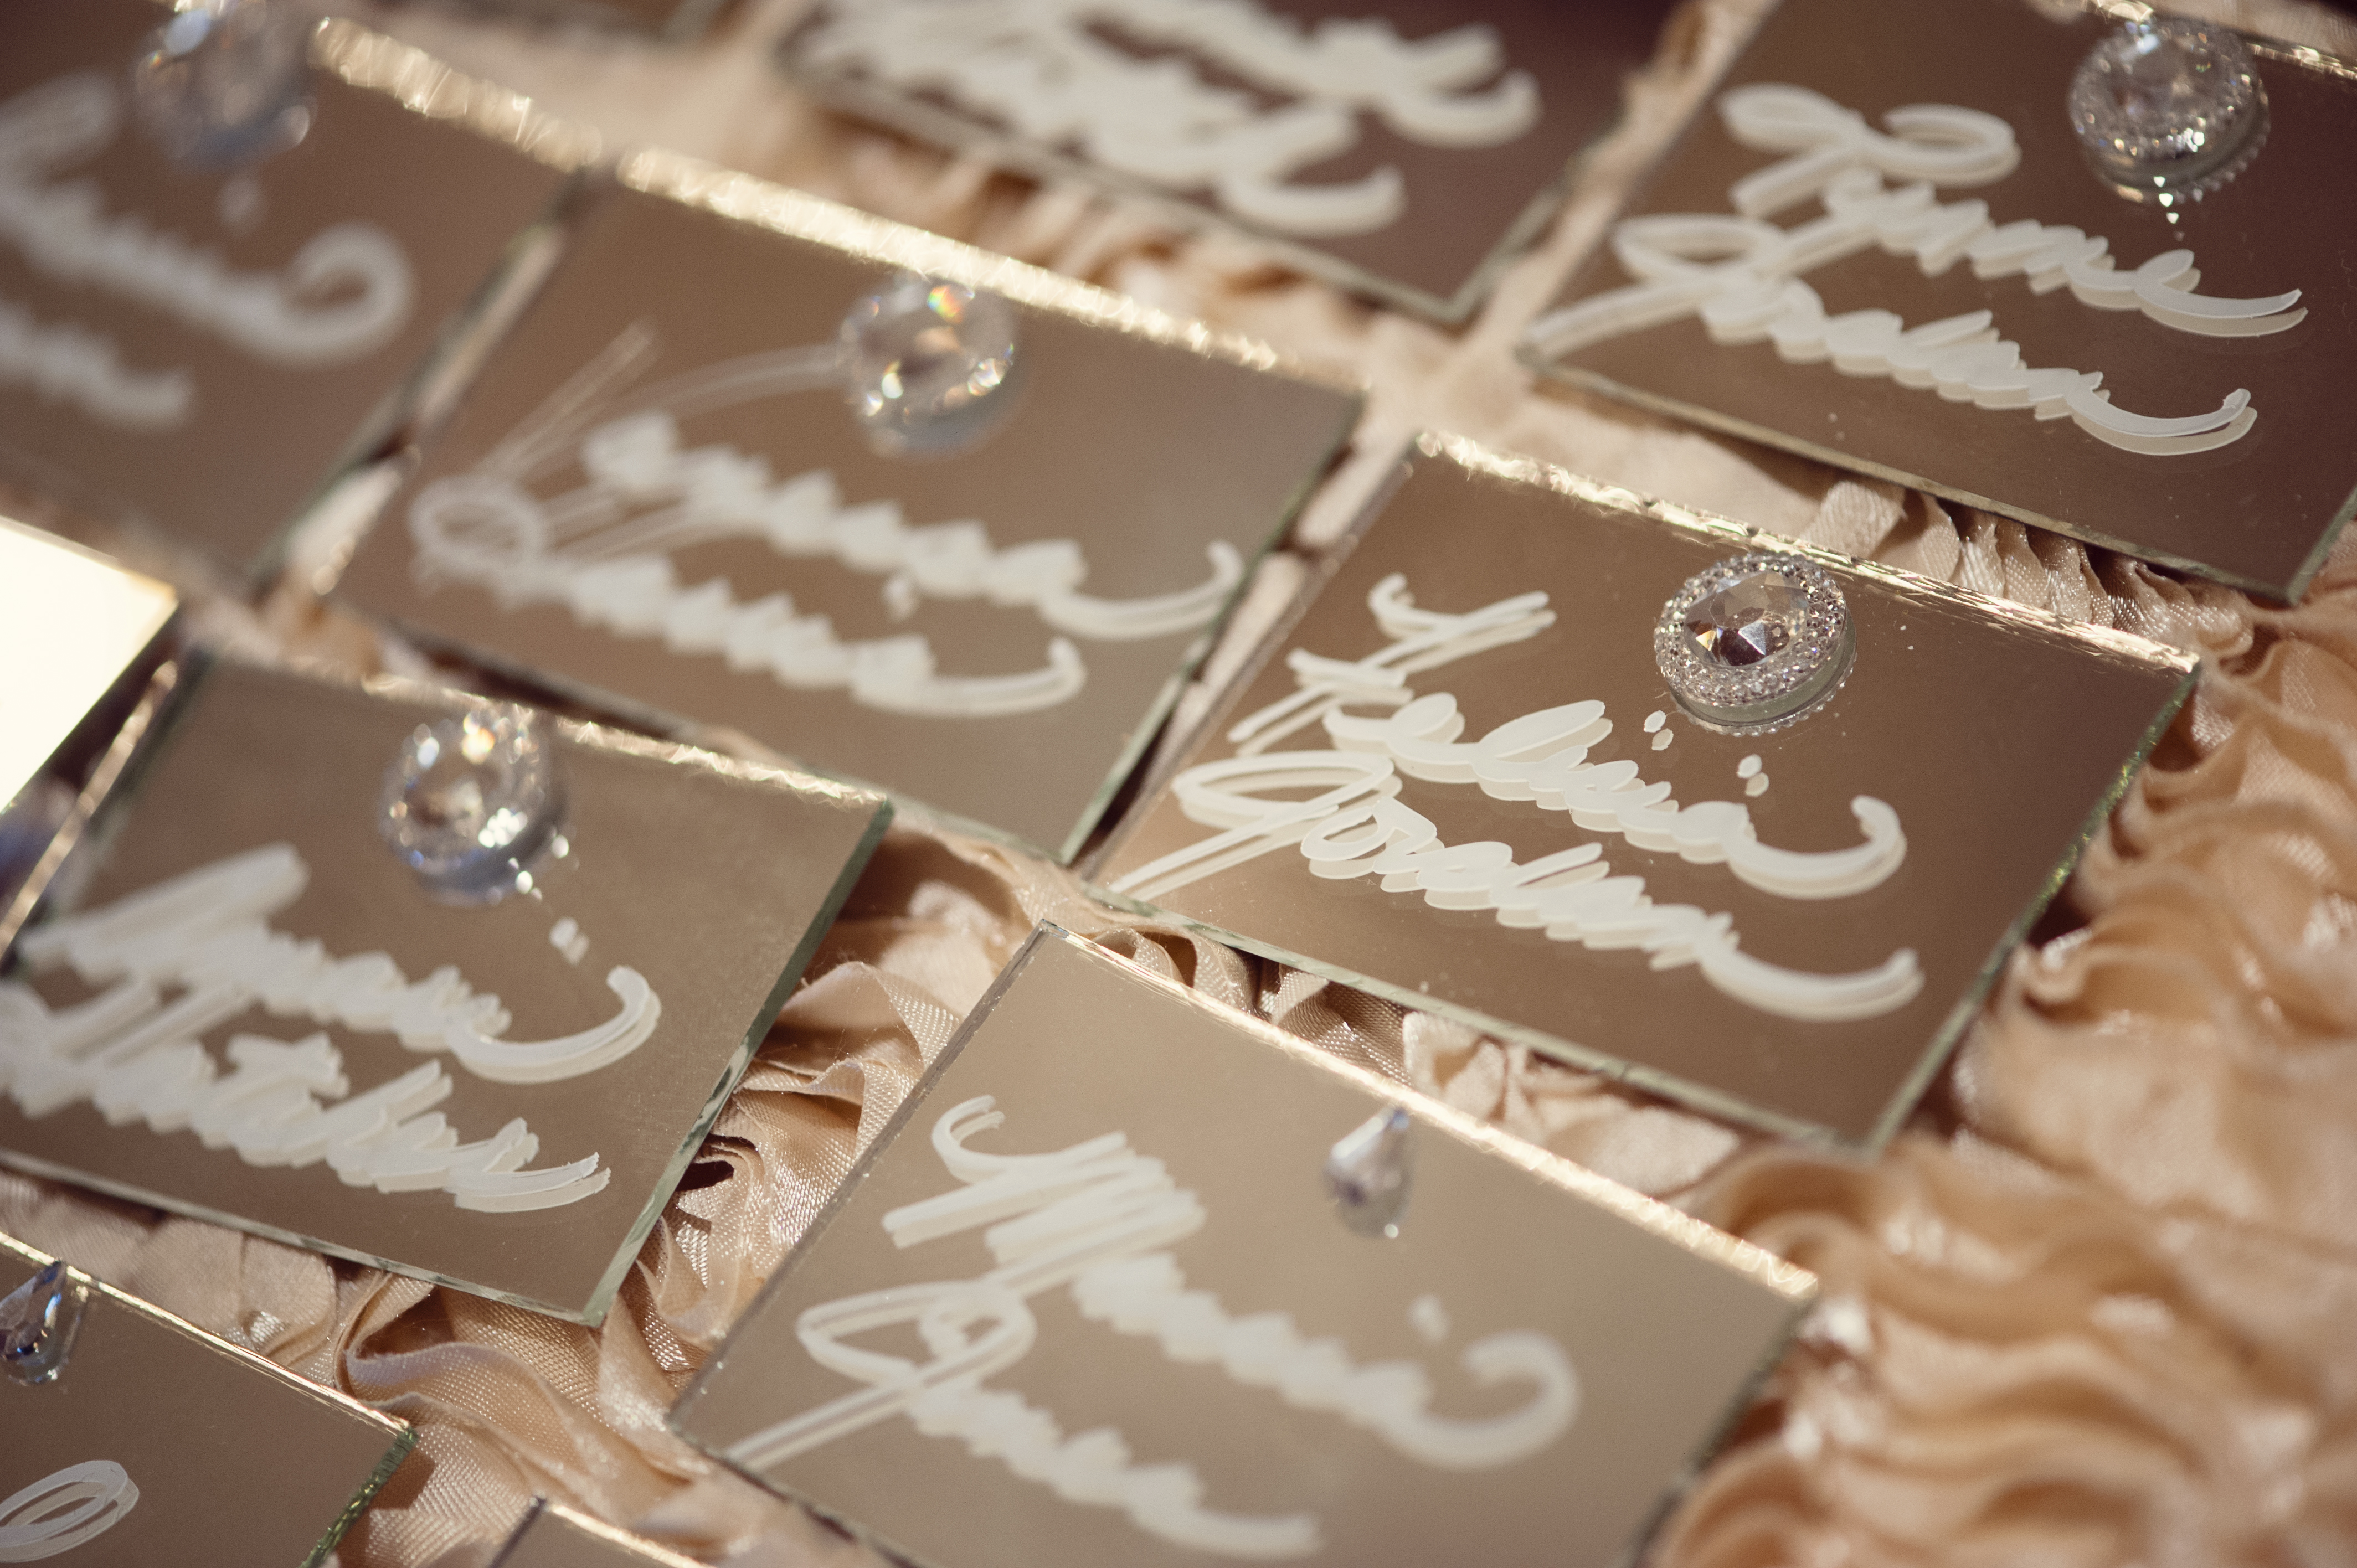
Escort Cards: My favorite project out of all of my DIY’s would have to be the mirrored escort cards! I knew I wanted a very classic and glamorous element, but I wanted something that I had never seen done before. I mean what’s more creative then a mirrored place card that guests can take home with them and use!?
The first thing I did was head to my favorite craft store here in Michigan to see if I could find mirrors the size of a business card in bulk. And I found exactly that! I was able to get 300 mirrors for less than $60. Keep in mind, most calligraphers charge $1.50-$2.50 per name they have to write, and that doesn’t include the mirror or paper they are writing on, so already I have saved anywhere from $500-$750 dollars. I did a bit of research, and communicated with some of my favorite calligraphers and found that paint pens are the best pens to use to write on mirrors. So to Michael’s I went! Paint pens cost about $10 for a pack of 2. I decided white pens would show better on the mirrors after trying out both gold and white. The pens I couldn’t use were returnable, so I took the pens back that didn’t work so well. Keep in mind the small pen size was the best, extra thin was too thin, and the medium was too large for the font size I was looking for. Then the auditions began!! *insert giggle* I auditioned all my friend with great handwriting, and my bestie Nina won! Whoop-whoop! I didn’t have to have a specific font type in mind, as much as I wanted very romantic cursive! That was my choice. I did what worked for my taste. Nina’s handwriting was perfect, and she was a trooper writing the names of everyone on my guest list for me (290 to be exact). I gave her a beautiful gift to show my gratitude. **Make sure you thank the people that are giving you their time! That is a must.**
My final touch was adding the mini crystal broaches to each mirror. They were super easy to apply, and they are stick on, so it wasn’t super messy to work with. I wanted to keep the broach element since my wedding invitations all had broaches of some kind on them. Making sure every element of your wedding has a central theme and is cohesive, creates the perfect ambiance for your big day!
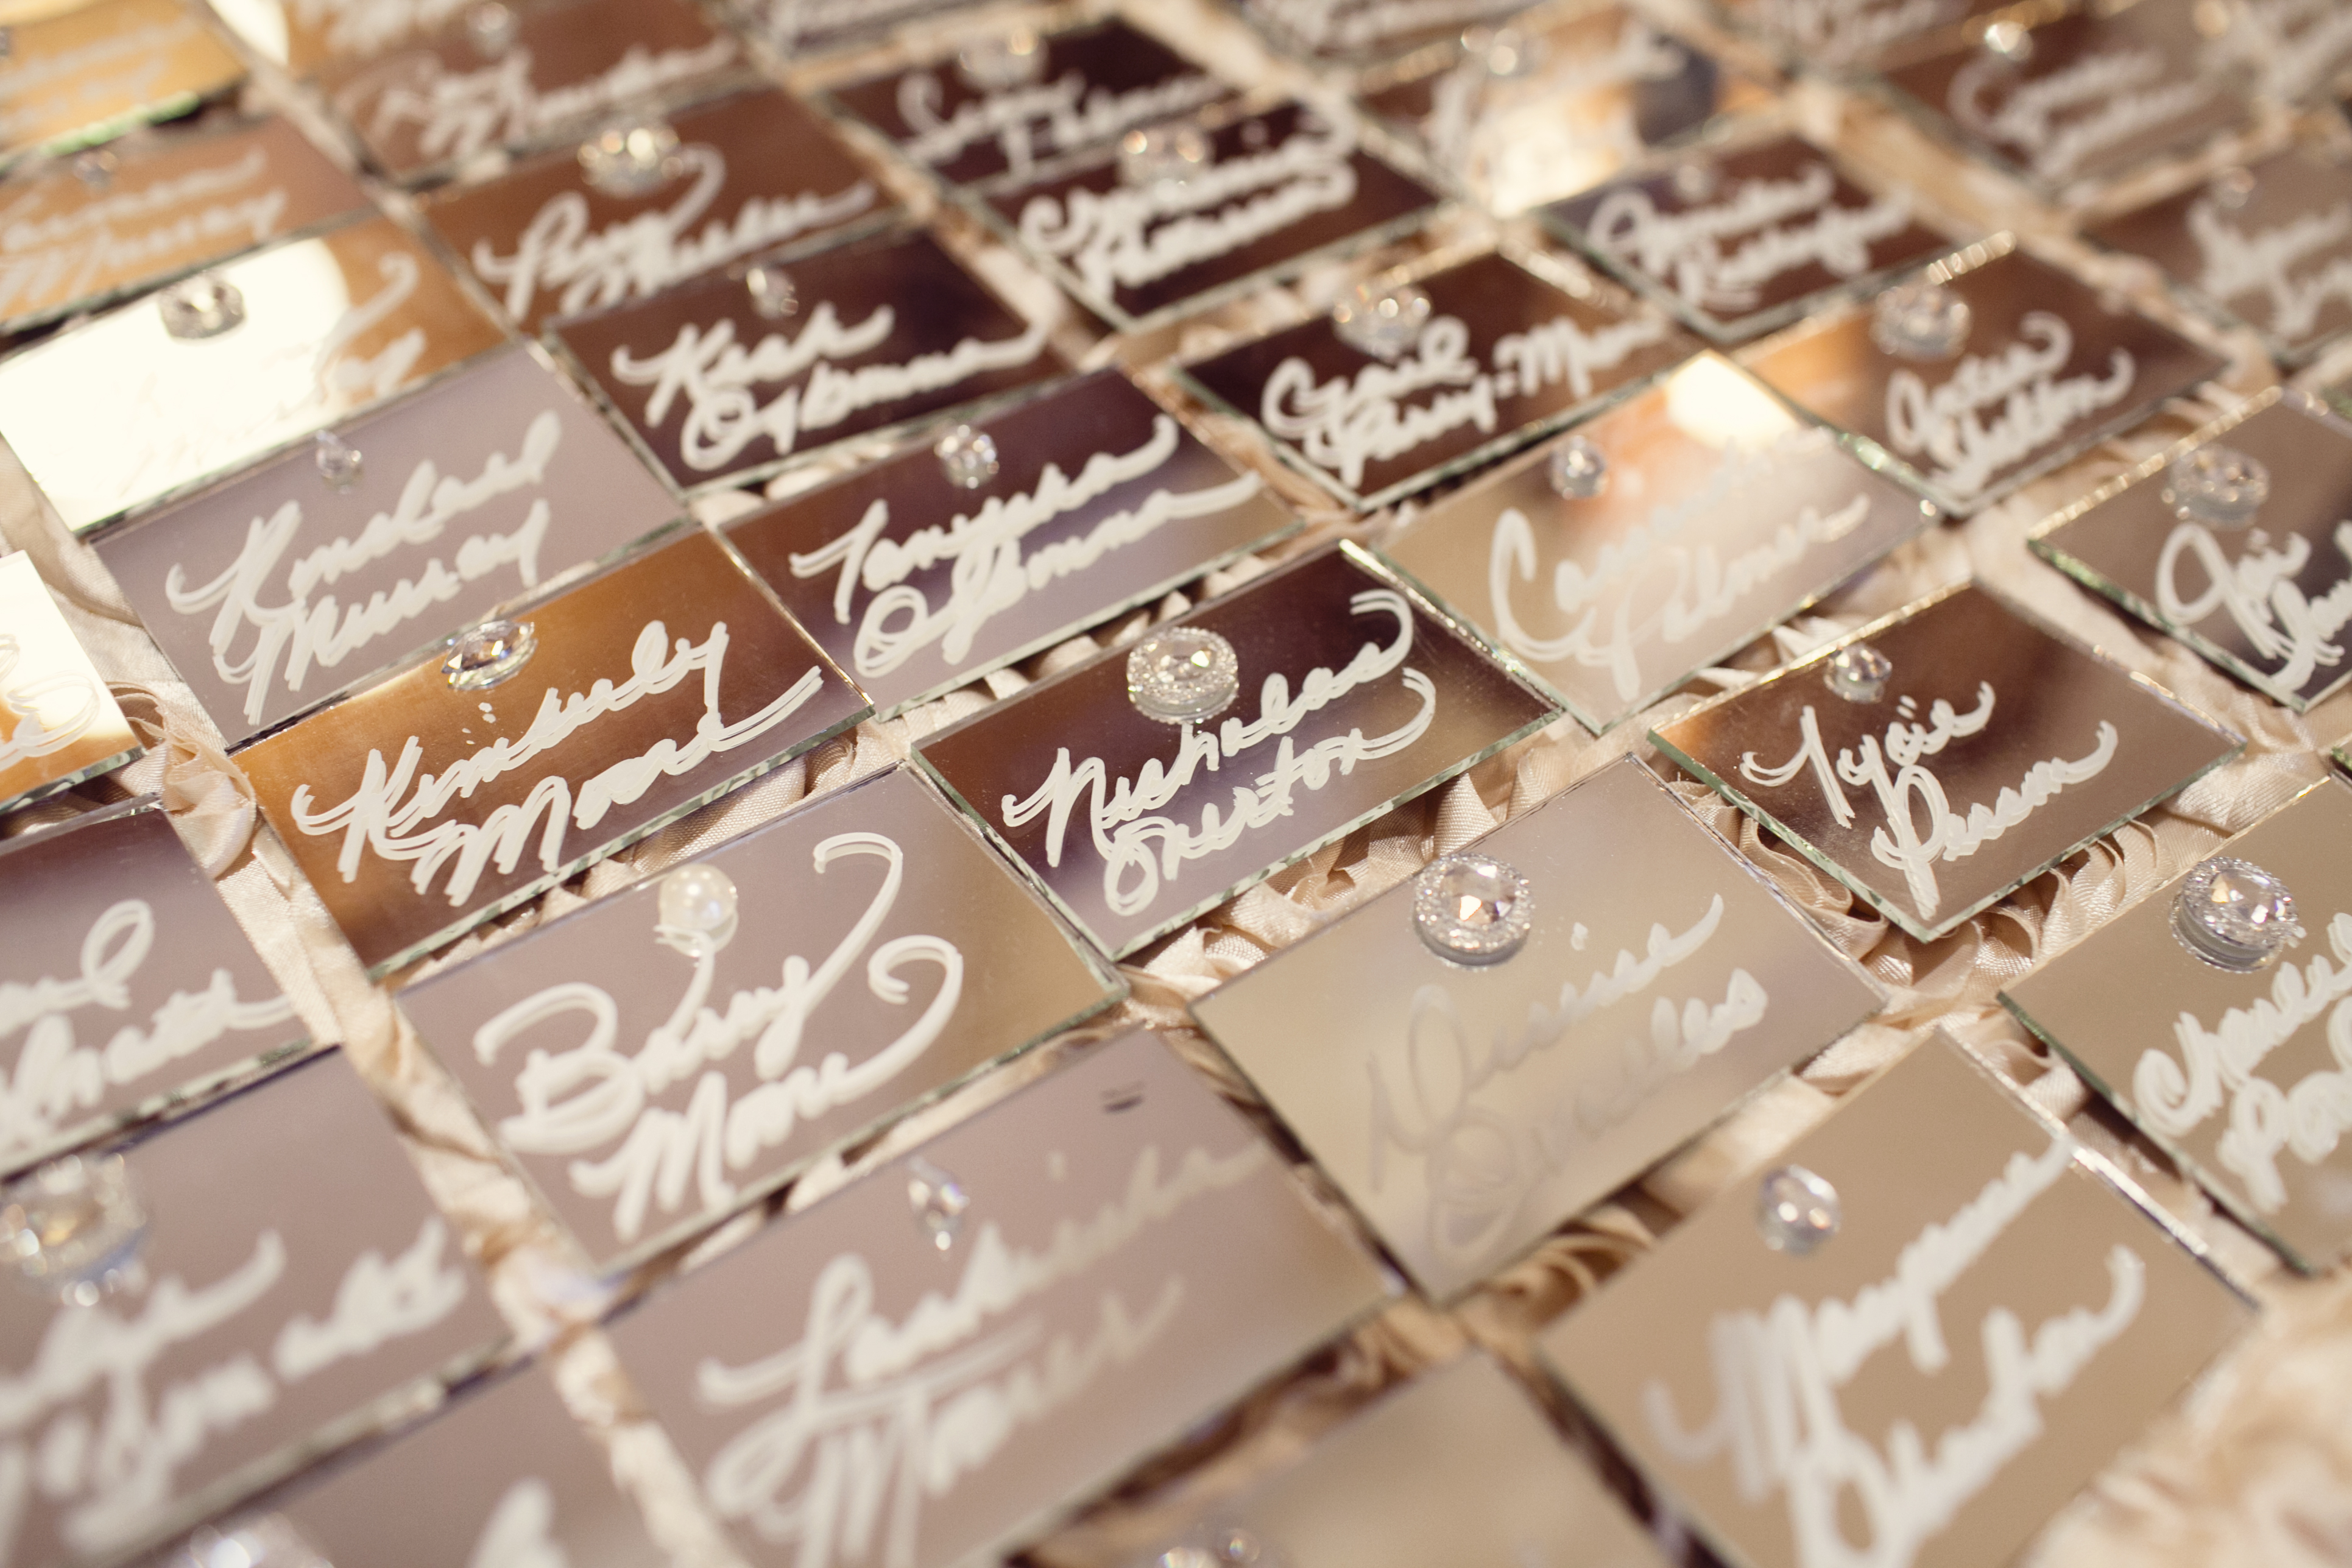
Isn’t this beautiful, I sure thought so!
Table Numbers: I knew I wanted crystal table numbers, but didn’t wish to pay the hefty $680 it would have cost, for numbers 1-25, so I went an alternate route. The same store I got the mirrors for the escort cards, is the same store I purchased the round mirrors for the table numbers! And guess what, I only paid $20 for 30 round medium sized mirrors! I was able to find the stands for the mirrors at the Dollar store, you read correctly, the Dollar Store! So, the next challenge was to find the numbers. Etsy to the rescue. I found a store on Etsy, Couture Embellishment, look them up! They sold the crystal adhesive numbers I needed, and I paid $72 including shipping. Talk about winning! Putting them together myself not only saved me money, but gave me the opportunity to create my unique table numbers, not to mention I kept, $560! Not to shabby! Again, staying true to my crystal broach theme throughout our wedding, making sure that I also added that element to the table numbers was imperative! Cohesiveness and ambiance.
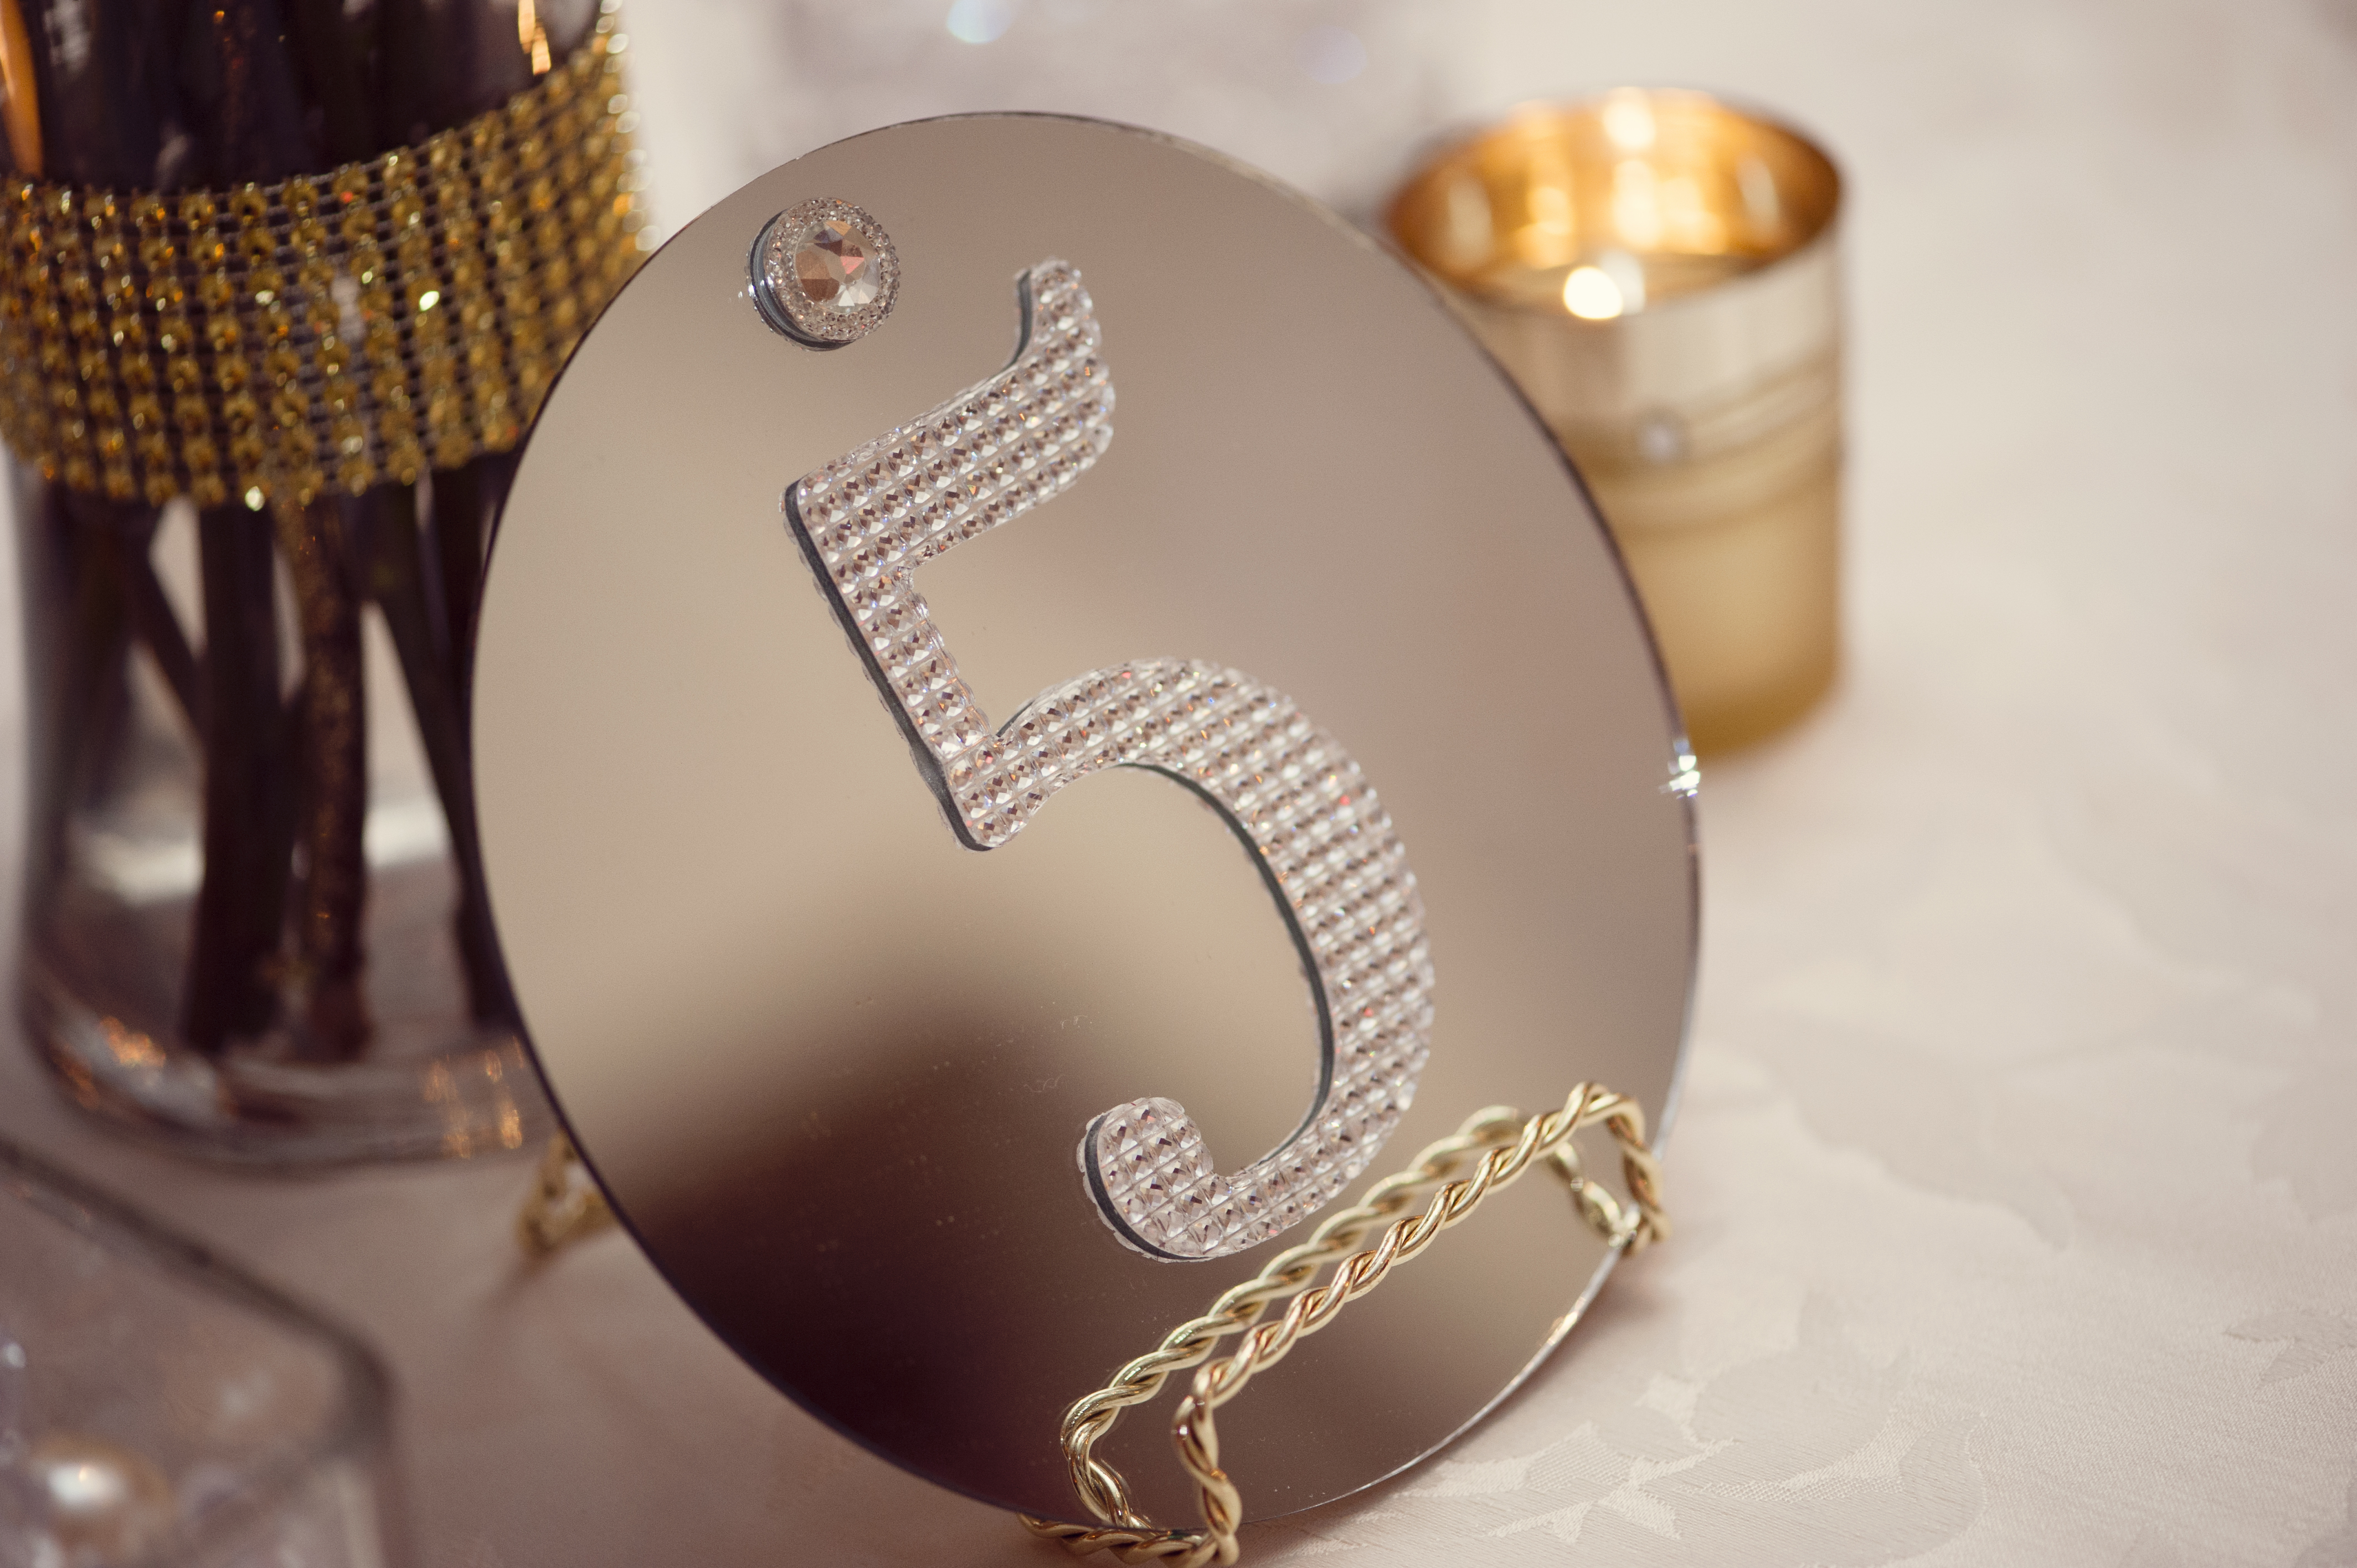
Table Number Glam!
Did someone say flowers? I thought you did, don’t worry I’ve got you covered!
Floral Centerpieces: If you’re anything like me, then you love real flowers! That was one of the most important things to me to have for our wedding, but I knew I couldn’t afford for my florist to do centerpieces for every table. So I opted for online website Global Rose. They have an excellent selection of fresh flowers for half the price of most local florists. I got 150 ivory roses for less than $120 including delivery. They arrived two days before my wedding, which was perfect for freshness. I along with my awesome friends put them in vases I borrowed from my aunt, and added, the gold branches for an extra touch of luxury. My aunt had already added the gold crystal bands to each of the vases for me, so all I had to do was fill them with flowers.
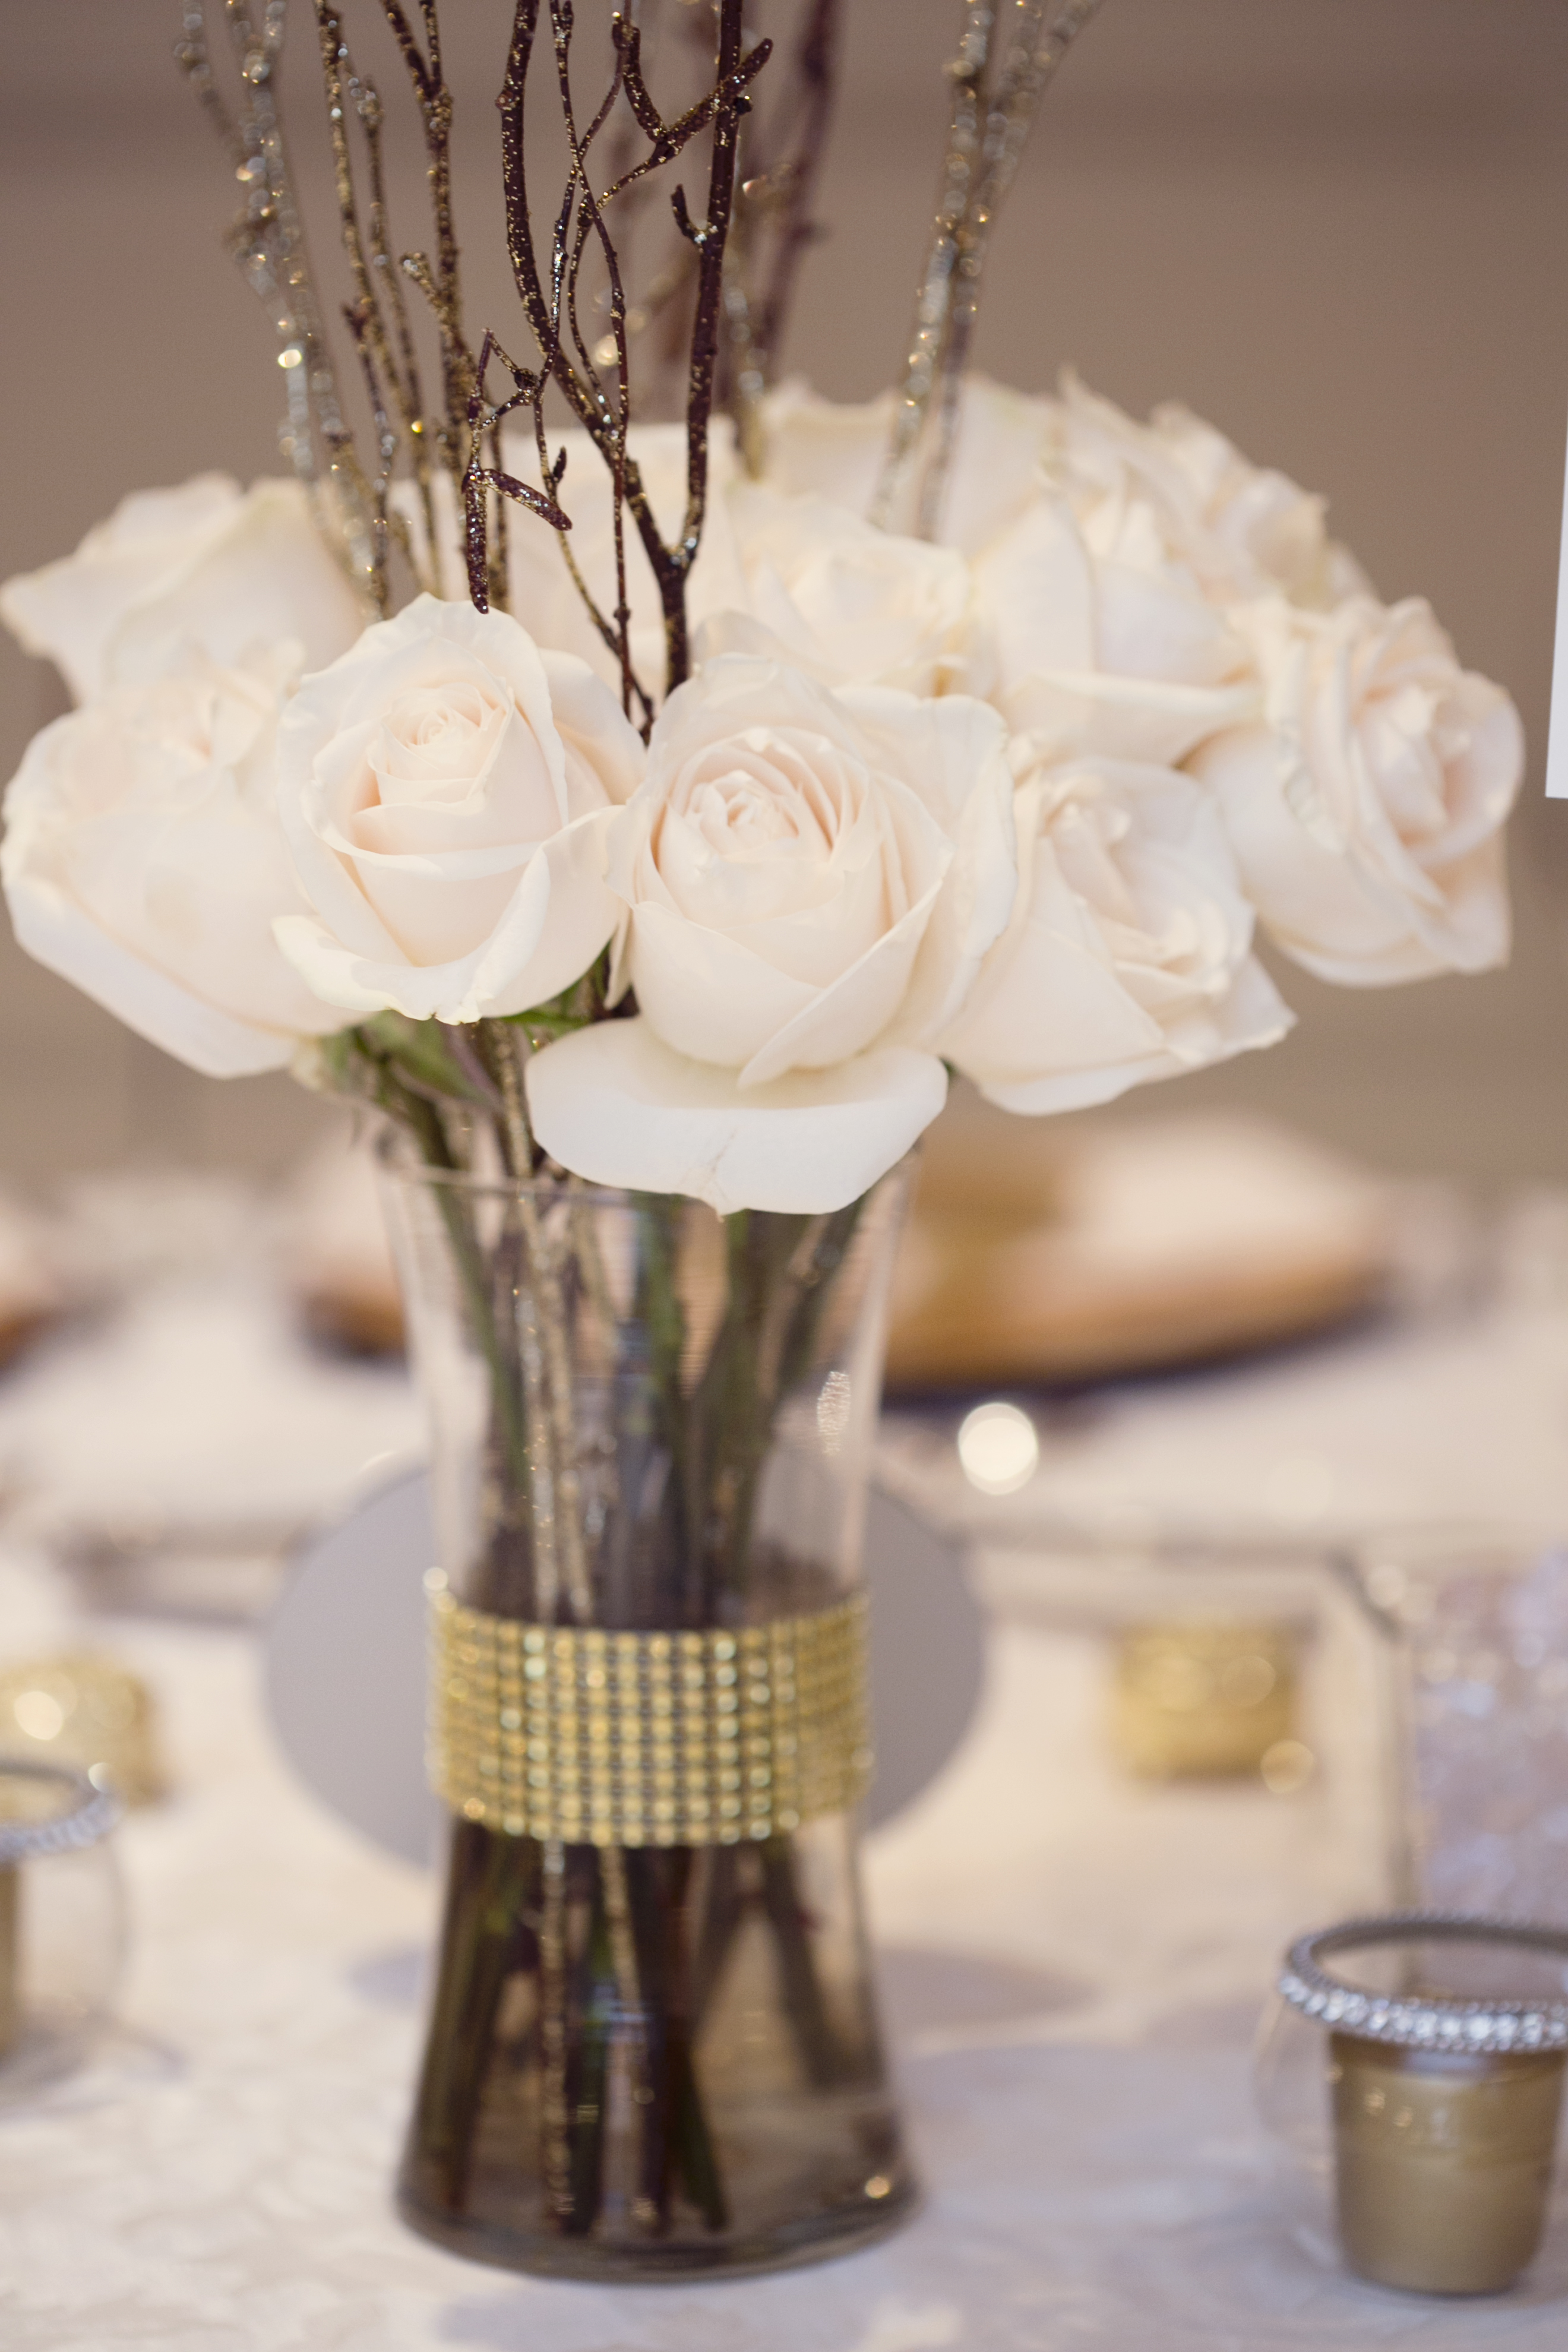
Each vase had a total of 15 or more roses in them. I even used some of the roses for my bridal shoot and the extras we had left over filled the flower girl baskets! It was such a great value, and I got multiple usages out of my roses. So if you have the time and the man power to assist, this is a great alternative to save money!
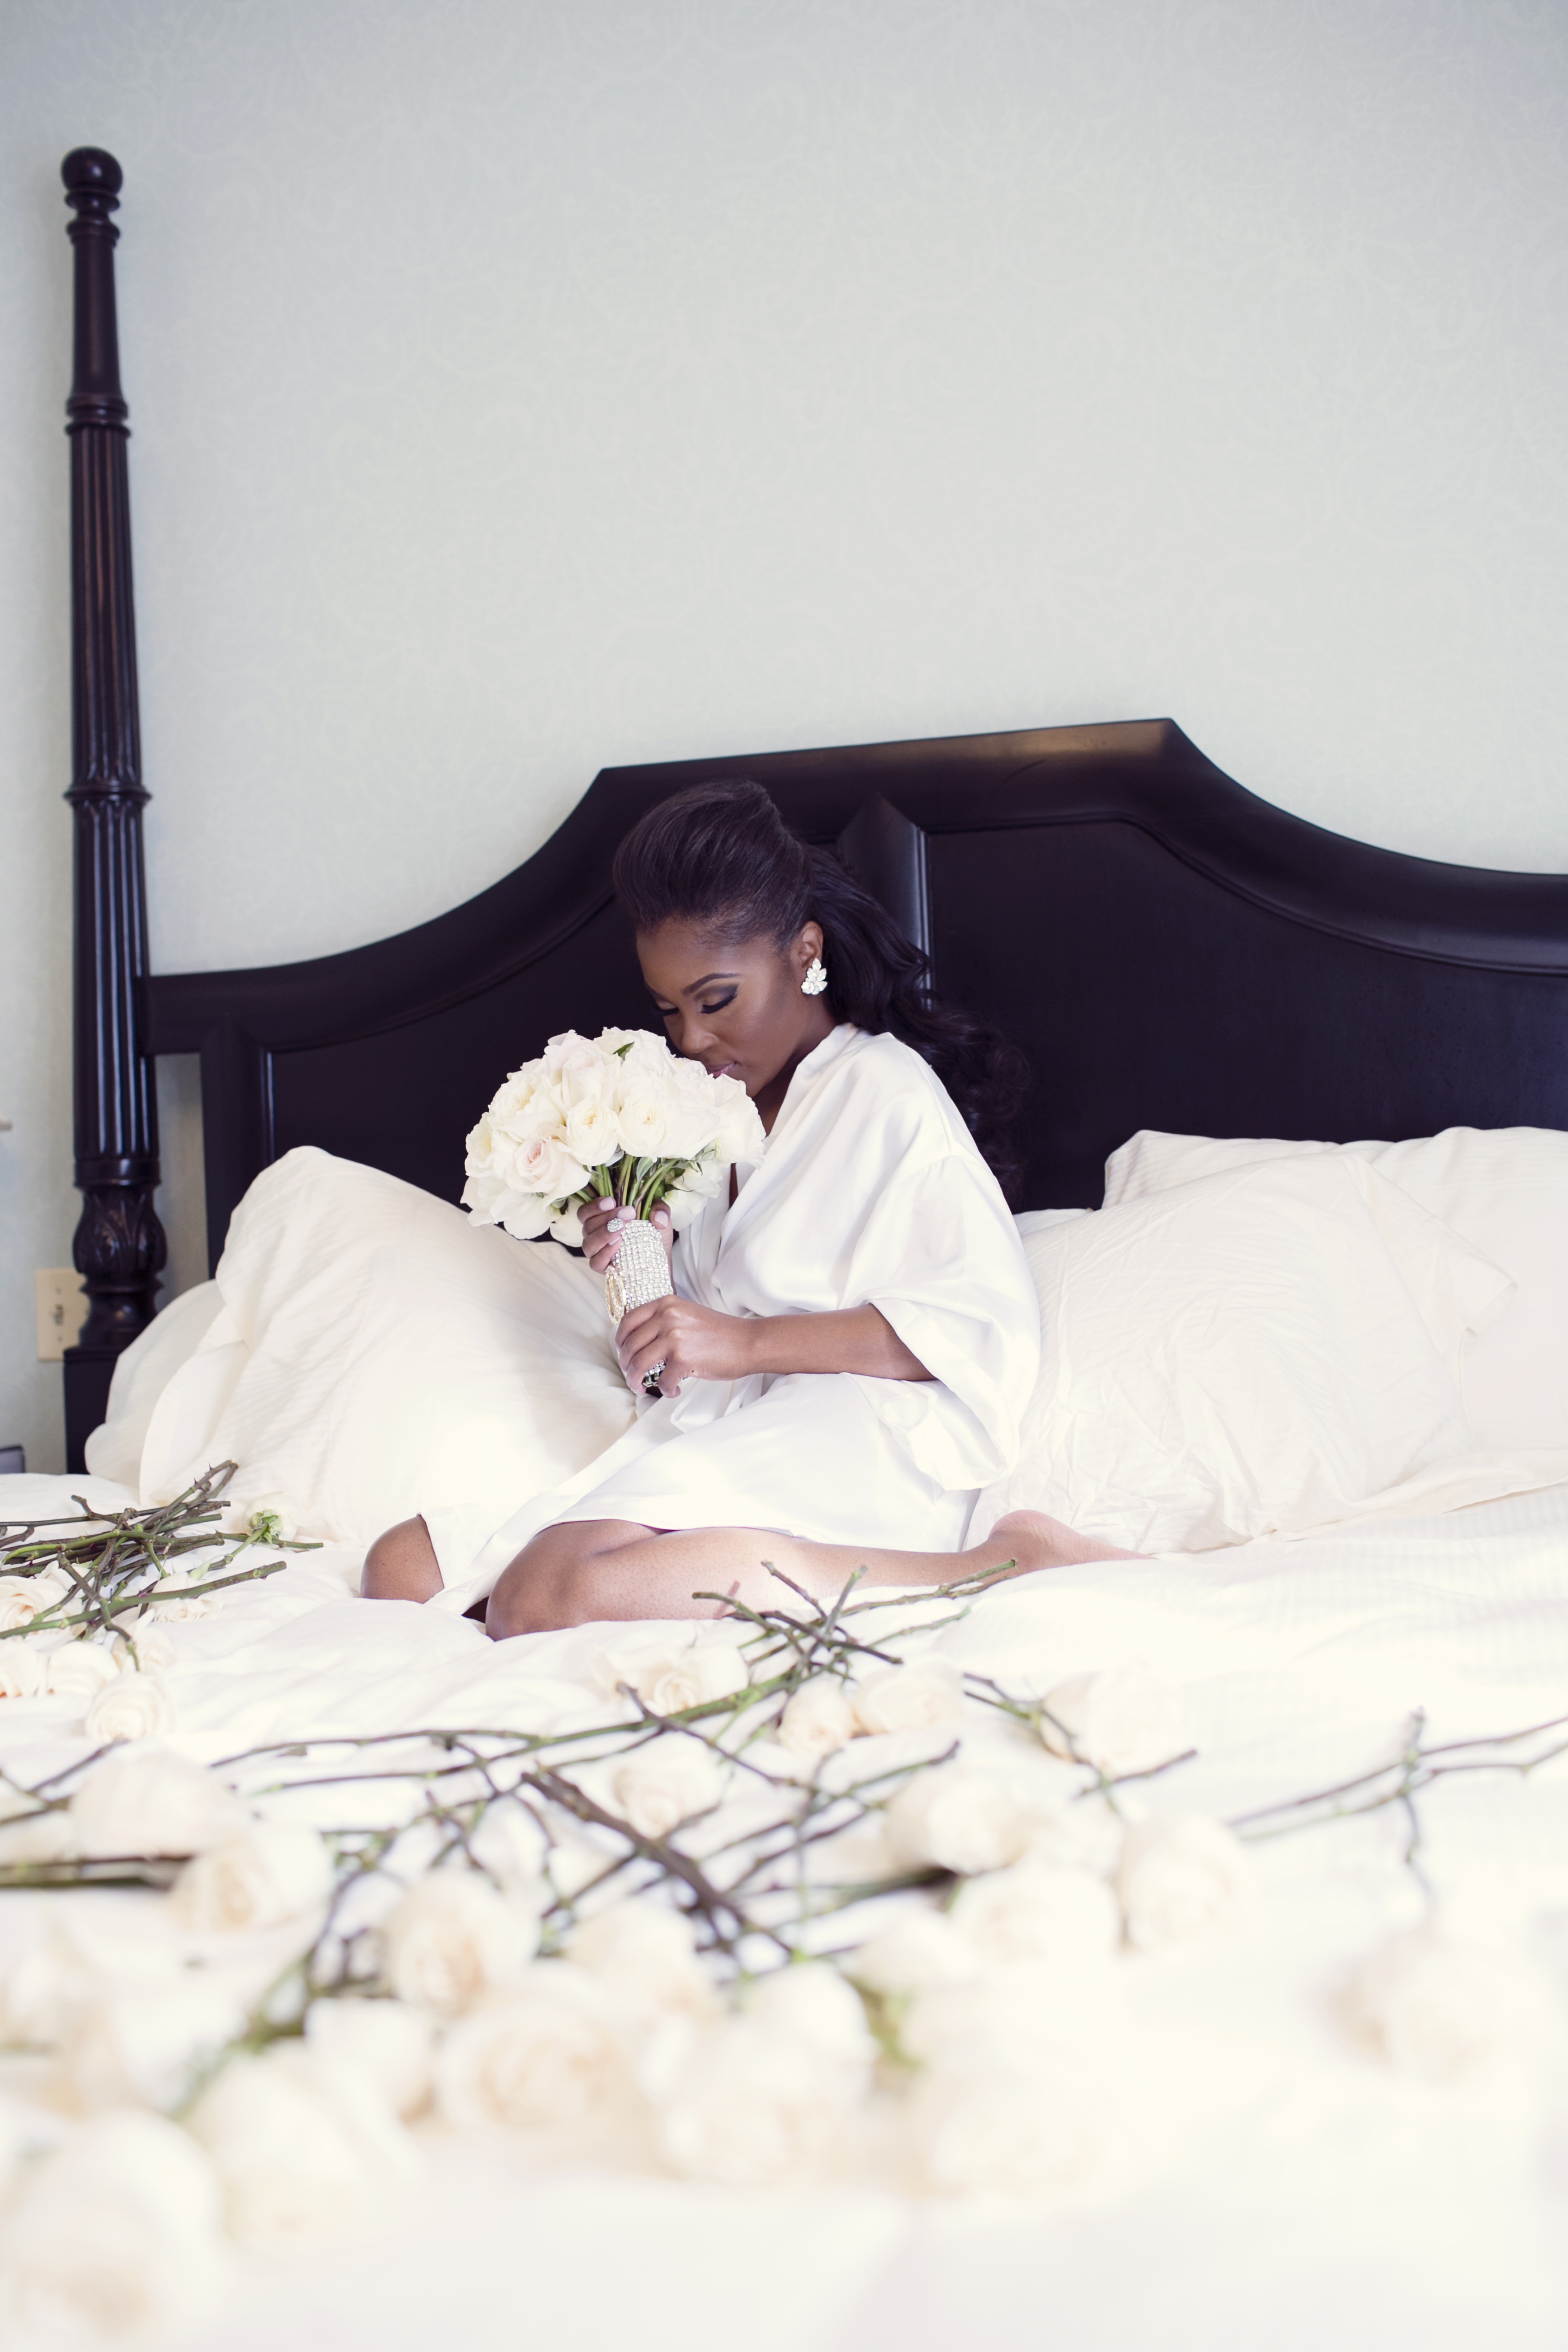
I truly love the smell of roses… It brightens my entire day…
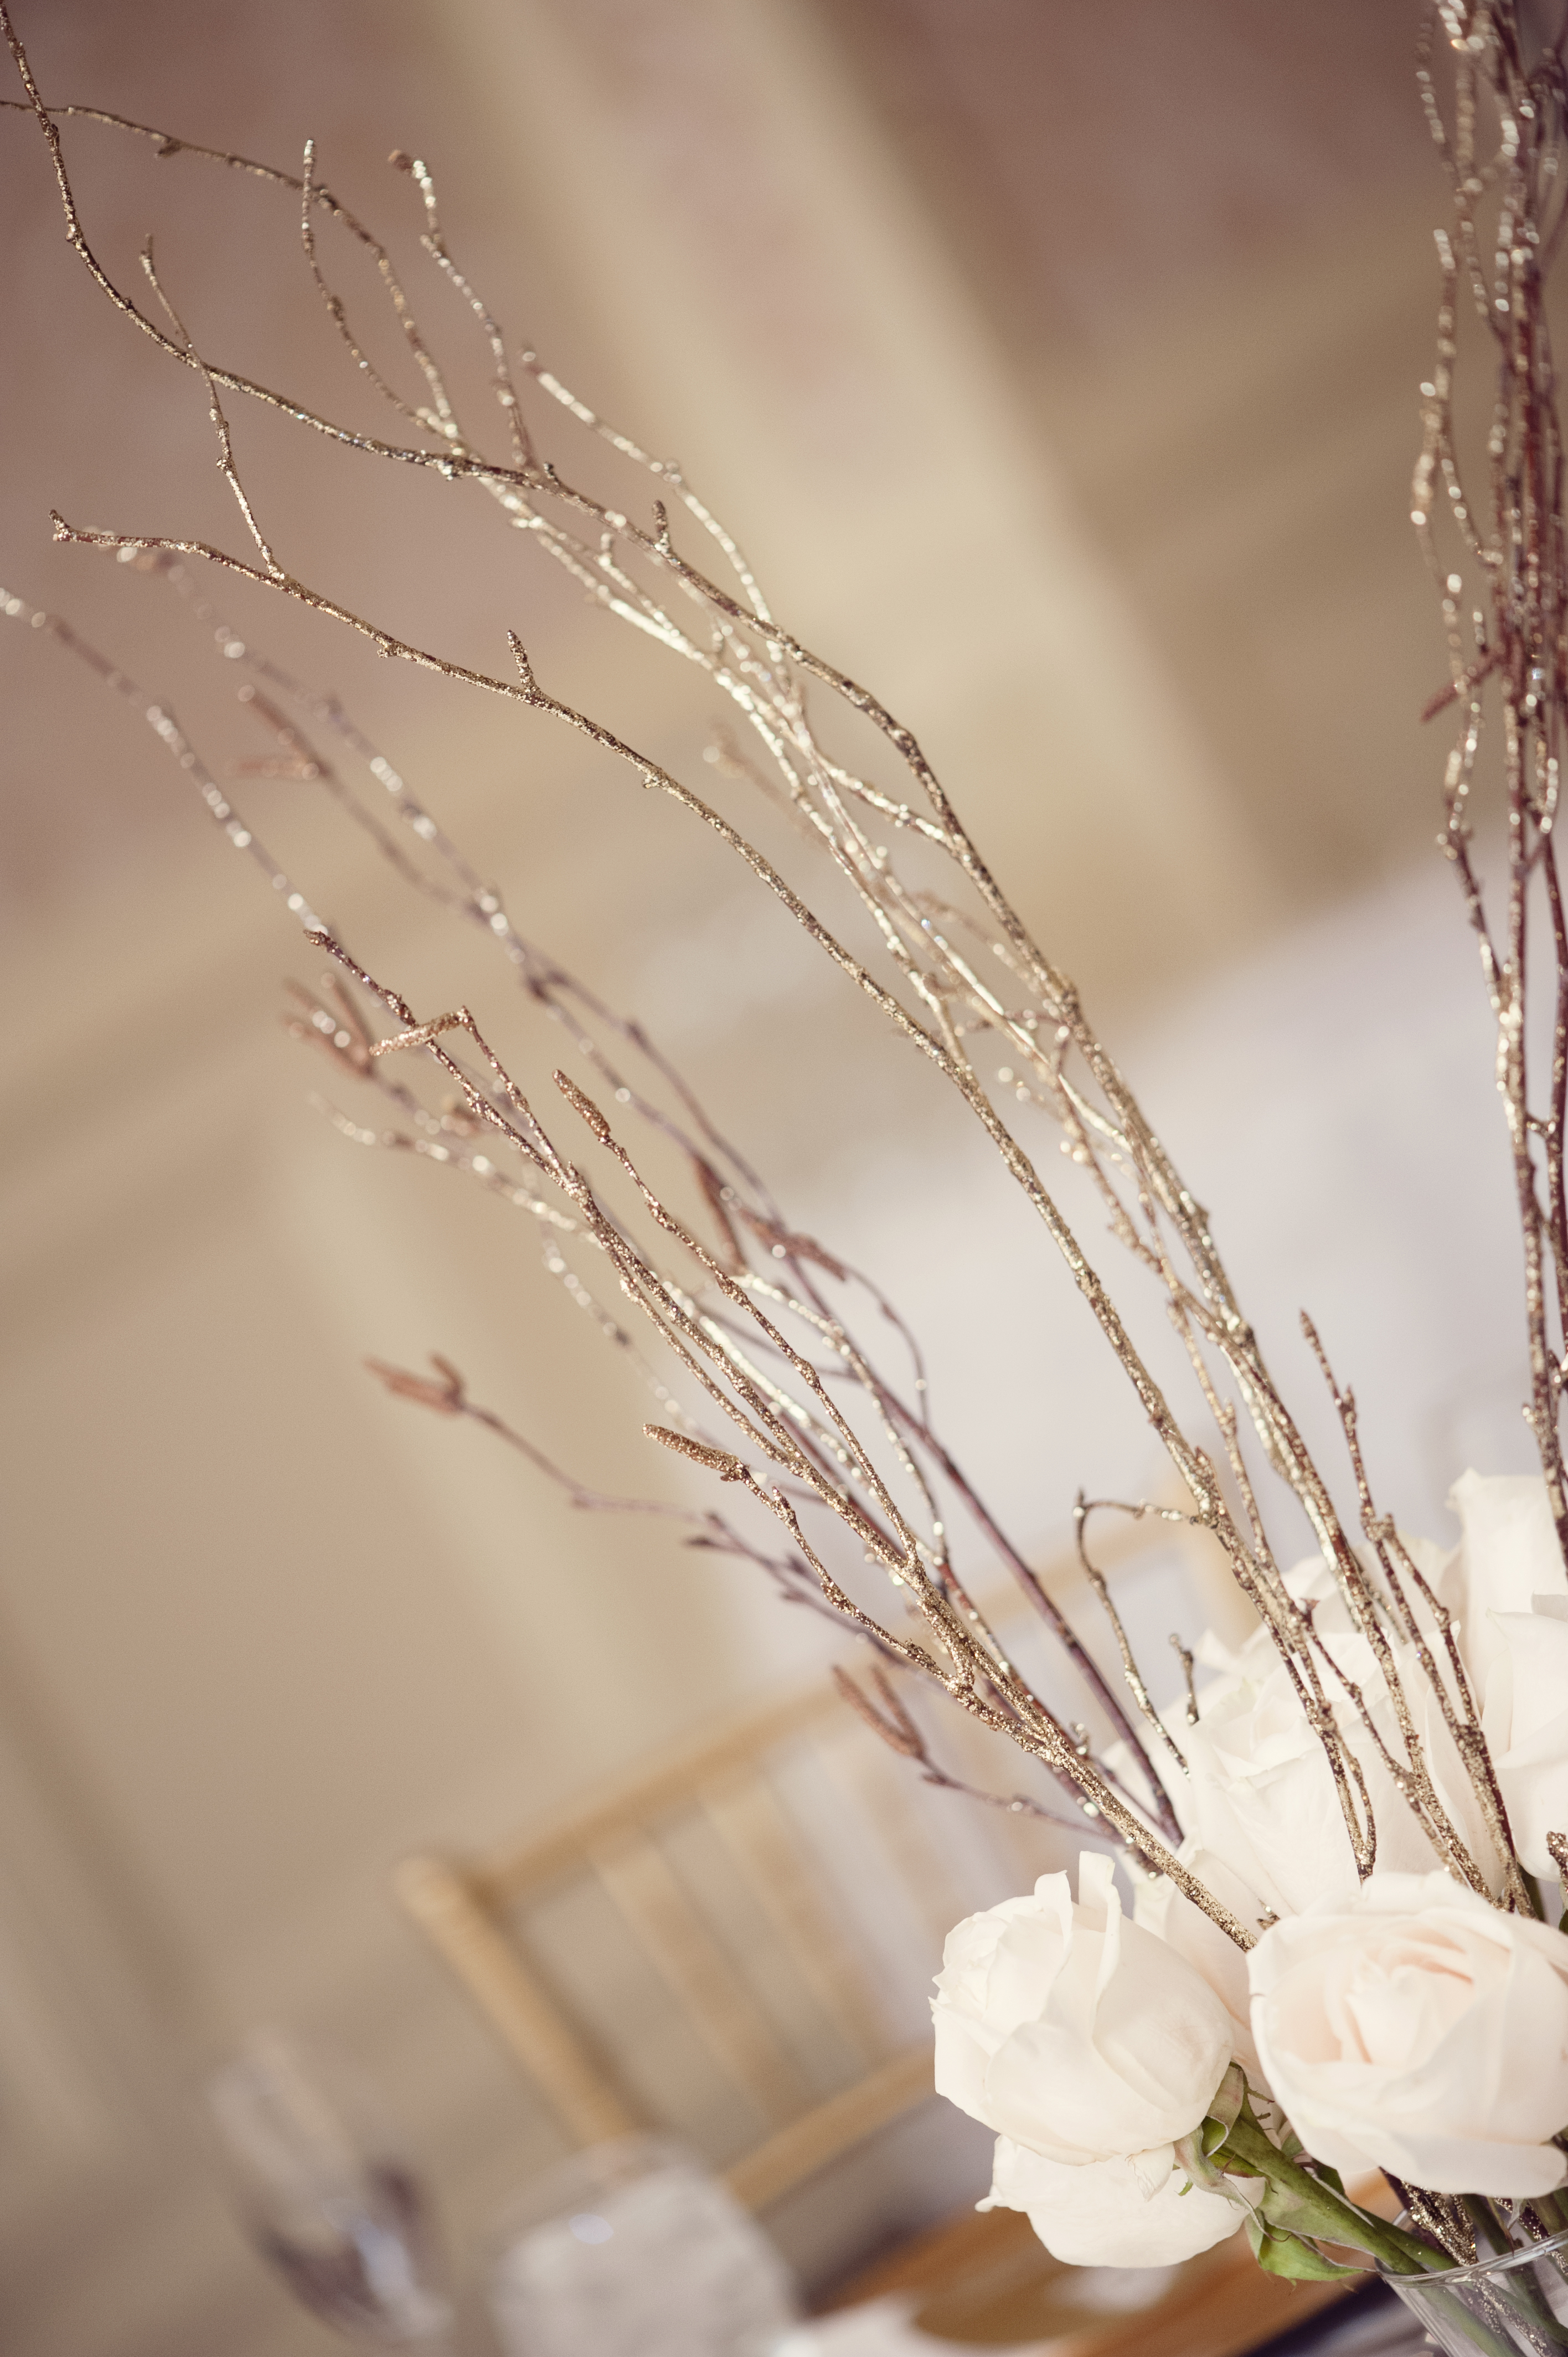
Golden Tree Branches: Because our wedding colors were gold and ivory, having golden trees were a must. Flowers and tree branches with crystals and pearls were all I could envision for our big day, so off to the craft store I went! My Aunt and I found these amazing branches that were about $7 a piece. We purchased four large ones, which were white when I purchased. I went to Lowe’s Hardware store and purchased rose gold spray paint, and my fiancé at the time, and I got our hands dirty! After painting each branch, I then added the crystals and gold beads to the branches, that I paid no more than $10 for, and my project was complete. Remember glue guns are necessary! If you don’t have one, it’s a great investment!
Did someone say Champagne? What’s a wedding without Champagne?
Glitter Champagne Party Favors: This by far was the most tedious and time-consuming project by far. Having at least four people at a time to help with the project is a must.
Here’s what you’ll need:
• Bottles of your favorite champagne ( I purchased split sizes, for each guests to have their own personal bottle)
• Craft Glitter in the color of your choice (Try to choose a color that matches the foil on your champagne bottle so it all blends in)
• Super 77 adhesive spray
• Plastic/Latex gloves
• Newspaper or a drop sheet

Wear gloves and only apply spray adhesive in a well-ventilated area. Put down a drop cloth or old sheet before spraying.
1. Start at the end of the foil on top of the champagne bottle and coat 1/3 of the bottle with adhesive spray. Sprinkle the first color of glitter you’ve chosen on this part of the bottle.
Tip: I suggest doing this outside with plenty of newspaper to avoid glitter bombing your living room.
2. To create the ombré look, mix a little bit of both colors of glitter together, and repeat the previous step on the middle third of the bottle.
3. Finish off the bottom third of the bottle with your second color of glitter. (if you are going with ombré if not one color can go all over the bottle)
Shake off excess glitter, then get ready display! I would recommend letting them dry for 24 hours prior to displaying. I also put double coats of glitter on my bottles to make sure the glitter was full and thick on each bottle. Feel free to put sparkly bottles on ice. I added bows to make my bottles a little more festive!
The key to this project is having a cool team to help you!!! It can become a fun project when friends are around! Dress casually, you’ll thank me later!

These were just a few of the many DIY projects I did for my wedding! I hope this helps many of you Bride’s to be out there! Check back soon as I give more project ideas and tutorials to help you along your journey!!
Just remember to BREATH….. It will all be worth it, I promise!

P.S. Discount Crafts & Florals in Centerline, MI is where I purchased all of my mirrored items and crystals! There is no way to buy online because it is a membership store for craft lovers and event designers like myself! But don’t worry, you can shop there and still receive cool discounts, you just have to make the trip. Trust me, it’s worth it!
CATEGORY
2/18/2016


COMMENT LOVE